
A garage does not fail at storage because you ran out of space. It fails because nobody found the studs. I have watched homeowners spend a whole Saturday on garage shelving and ceiling hooks, load them up, and then stand in the driveway three months later staring at a shelf that pulled a fist-sized crater out of the drywall. The shelf was fine. The wall was fine. The connection between the two was a drywall plug pretending to be a fastener.
The install order below is the one I use on paying jobs. It is not glamorous, it takes a Saturday, and it is the difference between storage that holds for a decade and storage that shows up in your rearview mirror.
Why you should trust me
I am Buck. I have been a general contractor in Kansas City for 20 years, and the last eight of those have been almost entirely garage storage: shelving, ceiling racks, wall panels, workbenches. I have installed storage in garages that the owner swore were hopeless, and I have made believers out of most of them.
My rules are simple. A weight rating is measured in a lab with perfect mounting, and your drywall is not a lab. A shelf anchored into drywall alone is a shelf that is coming down, so we find the studs or we find a different wall. And ceiling storage is the only free real estate in a garage. If you are not using it, you are renting it to the air.
I keep a tape measure in every pocket and a stud finder in every truck. That is the whole toolkit for this job, plus a level and a drill.
How I judge a shelf or a hook before I buy it
I do not care what the box says the unit weighs. I care about four things, in this order.
Where does the load go? A shelf transfers weight through its legs or brackets into a wall or a floor. A hook transfers weight into whatever it is threaded into. If the answer to "where does the load go" is "into drywall," the answer is no.
Can a homeowner install it with normal tools? If a product needs a hammer drill, a rotary hammer, or a second set of hands plus a come-along, that is a contractor job. Most garage storage should need a drill, a level, a stud finder, and a socket set.
Does it survive a garage's temperature swings? Kansas City swings from single digits in February to triple digits in August, and that cycle lives inside your garage. Powder coat flakes, plastic gets brittle, and cheap fasteners loosen. Anything that cannot survive a year of that is a seasonal product, not a storage product.
Would I put it in a paying client's garage? That is the last filter and the hardest one. If I would not stand behind it after a year, it does not make the truck.
The two pieces this job needs
You can spend a fortune on a garage. You do not need to. This job has two halves: something that stands on the floor and takes the bulk, and something that gets the long, awkward stuff out of your walking space. The pair below covers both, and they are the two pieces I would buy first.
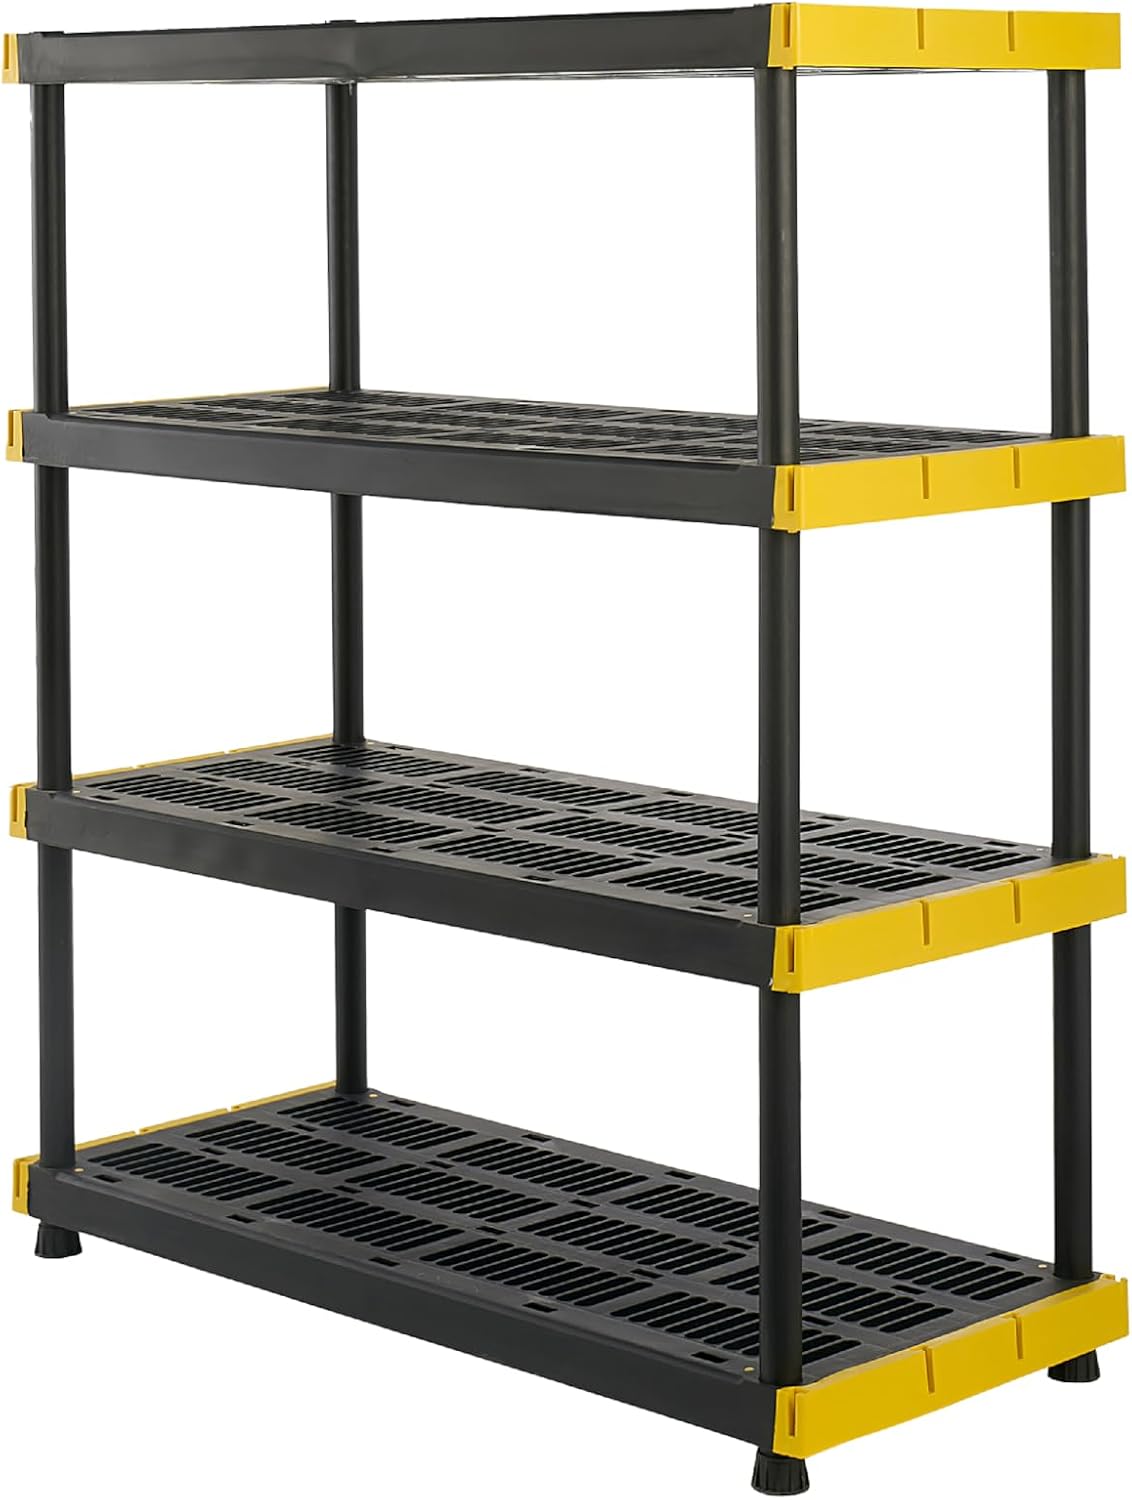
The base layer: CX 4-Tier Heavy Duty Plastic Storage Shelves for Garage Organization
 Visit on Amazon →
Four tiers is the right number for a garage. Three tiers leaves you stacking to the ceiling anyway, and five tiers puts the top shelf above your reach, which means you will need a step stool every time you want a paint can. Four tiers, roughly chest height at the top, is the sweet spot for a wall run.
Plastic has a place and I will defend it. It does not rust, it does not care about humidity, it does not scratch the car when you slide it, and it is light enough that one person can move it. That last part matters more than people admit, because garages get rearranged. The catch is the same catch that follows every plastic shelf: the load rating assumes the weight is spread evenly and the unit is sitting on flat, solid concrete.
So the honest use case is light and bulky, stored high. Seasonal bins, empty coolers, camping gear, the kids' outgrown sports equipment, the tote of extension cords. Keep the heavy stuff low, spread it across the tiers, and do not stack a loaded tool box on the top shelf just because it fits.
Flaws but not dealbreakers: It is plastic, and plastic flexes under point loads. Set the heavy totes on the bottom tier, keep the middle tiers balanced, and check the joints once a season. If you need to store engine blocks, this is the wrong product and you already knew that.
Anyone organizing a two-car garage with a wall to spare, and a realistic idea of what "heavy duty" means for a plastic unit, will get years out of this.
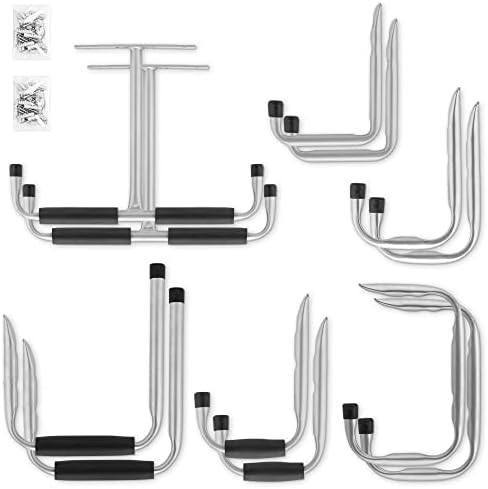
The space-maker: Navaris Garage Ceiling Hooks (Set of 12) - Heavy Duty Storage Hook Hangers Variety Pack for Hanging Bike, Ladder, Equipment - Overhead Ceiling Mount
 Visit on Amazon →
This is the half of the job most people skip, and it is the half that gives you your floor back. A ladder leaning against a wall eats three feet of floor space forever. The same ladder on a ceiling hook eats nothing. A bike on the floor is a bike you trip over. A bike on a hook is a bike that is not in your way.
The variety pack is the reason I like a set like this over buying hooks one at a time. Different shapes solve different problems: a wide J for a ladder rail, a deeper hook for a bike wheel, a smaller one for cords, hoses, and the folding chairs you use twice a year. Twelve hooks means you can hang the whole garage ceiling in one order instead of making four trips.
The install is where this lives or dies. These are overhead mounts, which means every pound they carry is hanging over your head and your car. They go into ceiling joists, not into drywall, not into the bottom of a finished ceiling panel, and not into the garage door track hardware. If the hook is not biting into solid wood, it is decoration.
Flaws but not dealbreakers: Overhead mounting is a two-person job once you are up on a ladder with a drill in one hand. Also, hooks do not space themselves. If you hang two bikes side by side without measuring the handlebar width, you will find out the hard way.
Anyone with exposed ceiling joists, or a finished ceiling they are willing to locate joists through, should start here before buying another shelf.
The install workflow, step by step
Now the part you came for. This works for a shelving unit and a set of ceiling hooks in the same afternoon.
Step one: Read the wall and the ceiling. Before you buy anything, look at what you are attaching to. Bare studs in an unfinished garage is the easy case. Drywall over studs is the normal case. Concrete block is its own project with its own anchors. A finished ceiling hides the joists, which means you are finding them with a stud finder and confirming with a small pilot bit.
Step two: Find and mark the studs. Run the stud finder across the wall and mark both edges of every stud with painter's tape, then mark the center. Studs are typically 16 inches on center, but do not trust that. Old garages do strange things. Mark the centers and measure between them.
Step three: Match the shelf to the studs. A four-tier unit wants its uprights over studs. If the studs do not land where you want the shelf, you have two choices: move the shelf, or add a horizontal backer board spanning the studs and fasten the shelf to the backer. The backer is the professional answer and it takes 20 minutes.
Step four: Level before you load. Set the unit on the concrete, check level front to back and side to side, and shim the feet if the slab slopes. Garage slabs slope toward the door on purpose. A shelf that looks level when empty will lean once it is loaded, and a leaning shelf is a shelf that wants to walk.
Step five: Mark the ceiling joists for the hooks. Same stud finder, different plane. Find the joists, mark the centers, and lay out your hooks on paper first. Put the ladder hooks where the ladder goes, the bike hooks where the car does not park, and leave a clear path to the door.
Step six: Drill pilot holes and drive the fasteners. Pilot holes keep the wood from splitting and keep the hook from wandering. Drive the fastener until it is tight against the wood, not until your arm says stop. Bolts that strip before they are tight are one of my least favorite things on earth, and they happen when the pilot hole is too small.
Step seven: Test with the real load. Hang the ladder. Hang the bike. Then grab the hook and pull down hard, with your body weight, before you trust it with anything. If it moves, you missed the joist.
Step eight: Load the shelf low and even. Heaviest items on the bottom tier, medium in the middle, light and bulky up top. Keep the center of gravity low and keep the load balanced side to side.
Step nine: Recheck after the first season. Garages move. Wood shrinks in winter and swells in summer, and fasteners back out. Walk the whole system once in the spring and once in the fall with a socket wrench and a screwdriver. Two minutes, twice a year.
Caveats that change the plan
Wall type decides everything. Drywall alone holds a picture frame and nothing else. Drywall over studs, anchored into the studs, holds real weight. Concrete block needs masonry anchors and a hammer drill, and that is a different article.
Ceiling joists run one direction. Your hooks have to land on them, not between them. If the joists run the wrong way for your layout, you can span two joists with a piece of 2x4 and mount to that. Do not skip this and do not talk yourself into drywall toggles for a ladder.
Watch the garage door tracks and the opener rail. The overhead space near the door is tempting and it is also where the door travels. Measure the door in the open position before you hang anything above the car.
Plastic has a ceiling. Light and bulky up high, heavy and dense down low. That is the rule for a plastic shelving unit, and it does not bend for convenience.
The best storage is the one your spouse does not hate. I mean this. Organization that gets vetoed does not work. If the ceiling hooks over the parking spot make someone nervous, move them to the side wall. A system that survives the household is a system that survives.
What this all costs
Two line items do most of the work here: the shelving unit for the bulk and the hook set for the overhead. Check current Amazon price on both before you commit, because both move around.
Beyond the two products, budget for fasteners. Lag bolts, washers, and a backer board if your studs do not cooperate are cheap, and they are the difference between a system and a story. You will also need a stud finder and a level if you do not own them, and both pay for themselves on the next project.
The time is the real cost. A shelf and a set of ceiling hooks is an afternoon, maybe two if you are cutting a backer board and locating joists through a finished ceiling. That afternoon buys you a garage where the ladder is off the floor, the bikes are off the floor, and the totes are stacked in a straight line instead of a pile.
That is the job. Studs, load path, level, then load it. Do it once and the garage stops being the room where things go to be lost.