
Most heavy duty garage shelving does not fail because the steel is thin. It fails because the wall behind it was never ready for the load. I have pulled more collapsed units off garage walls than I can count, and almost every one of them had brackets that were perfectly fine and anchors that were not.
A garage is a workshop with a car parked in it. The storage in there has to survive Kansas City temperature swings, humidity, a door that slams, and a spouse who still wants to park inside. Getting heavy duty garage shelving right comes down to three things: the wall, the load path, and the order you do the work in.
This is the sequence I run on client garages, and it is the same one I run on my own. The install takes an afternoon. The planning takes longer than the drilling, and that is exactly how it should be.
Why you should trust me
I have been a general contractor for 20 years and spent the last 8 specializing in garage storage: shelving, ceiling racks, wall panels, workbenches. I have installed hundreds of shelving units in garages that were never going to be organized, and I have made believers out of most of the people who own them.
My rule on any storage product is simple. Load it with what the label says, then double it, then leave it for a year. Weight ratings are measured in a lab with perfect mounting. Your drywall is not a lab. I keep a tape measure in every pocket and a stud finder in the truck for a reason.
I also tell clients the truth when a product they already own is the wrong tool. Wire shelving from the big box store is fine for tote bags. The moment a tool box lands on it, you have made a bet.
What has to be true before you buy anything
Before you order a shelf, answer four questions about the space. If you cannot answer all four, you are shopping, not planning.
What is the wall made of? Drywall over wood studs is the common case and the easiest to work with, because you can anchor into wood. Poured concrete and block are common in garages too, and they need a completely different anchor. Drywall by itself holds paint and not much else. If you cannot find a stud, you are not ready to hang anything.
Where does the load go? A shelf transfers weight down through its uprights to the floor and sideways into the wall. Both surfaces matter. A unit sitting flat and level on a slab is carrying its load the way it was designed to. A unit that is leaning because the slab slopes is pulling on the anchors every minute of every day, and it will win that fight eventually.
What is the real weight? Add it up before you buy, not after. A loaded 27-gallon tote of holiday decorations is heavier than people guess. So is a case of oil, a tile saw, a stack of brake rotors, a bag of concrete you forgot about. If your honest total is 800 pounds, buy a unit rated well above that, and then think about which heavy item goes where.
How deep can you go? Twelve inches of depth keeps a shelf tight to the wall and out of the parking space. Deeper units hold more and eat the aisle you need to open a car door.
One more thing about ratings. Manufacturers measure at the bracket in ideal conditions with a perfect mount. That number tells you what the steel can take, not what your wall can take. Plan for the wall.
The two pieces that do the work
For a standard two-car garage I want two things: a floor-standing unit that carries the real weight, and a wall-mounted organizer that gets the long and awkward stuff off the floor. Here are the two I would start with.
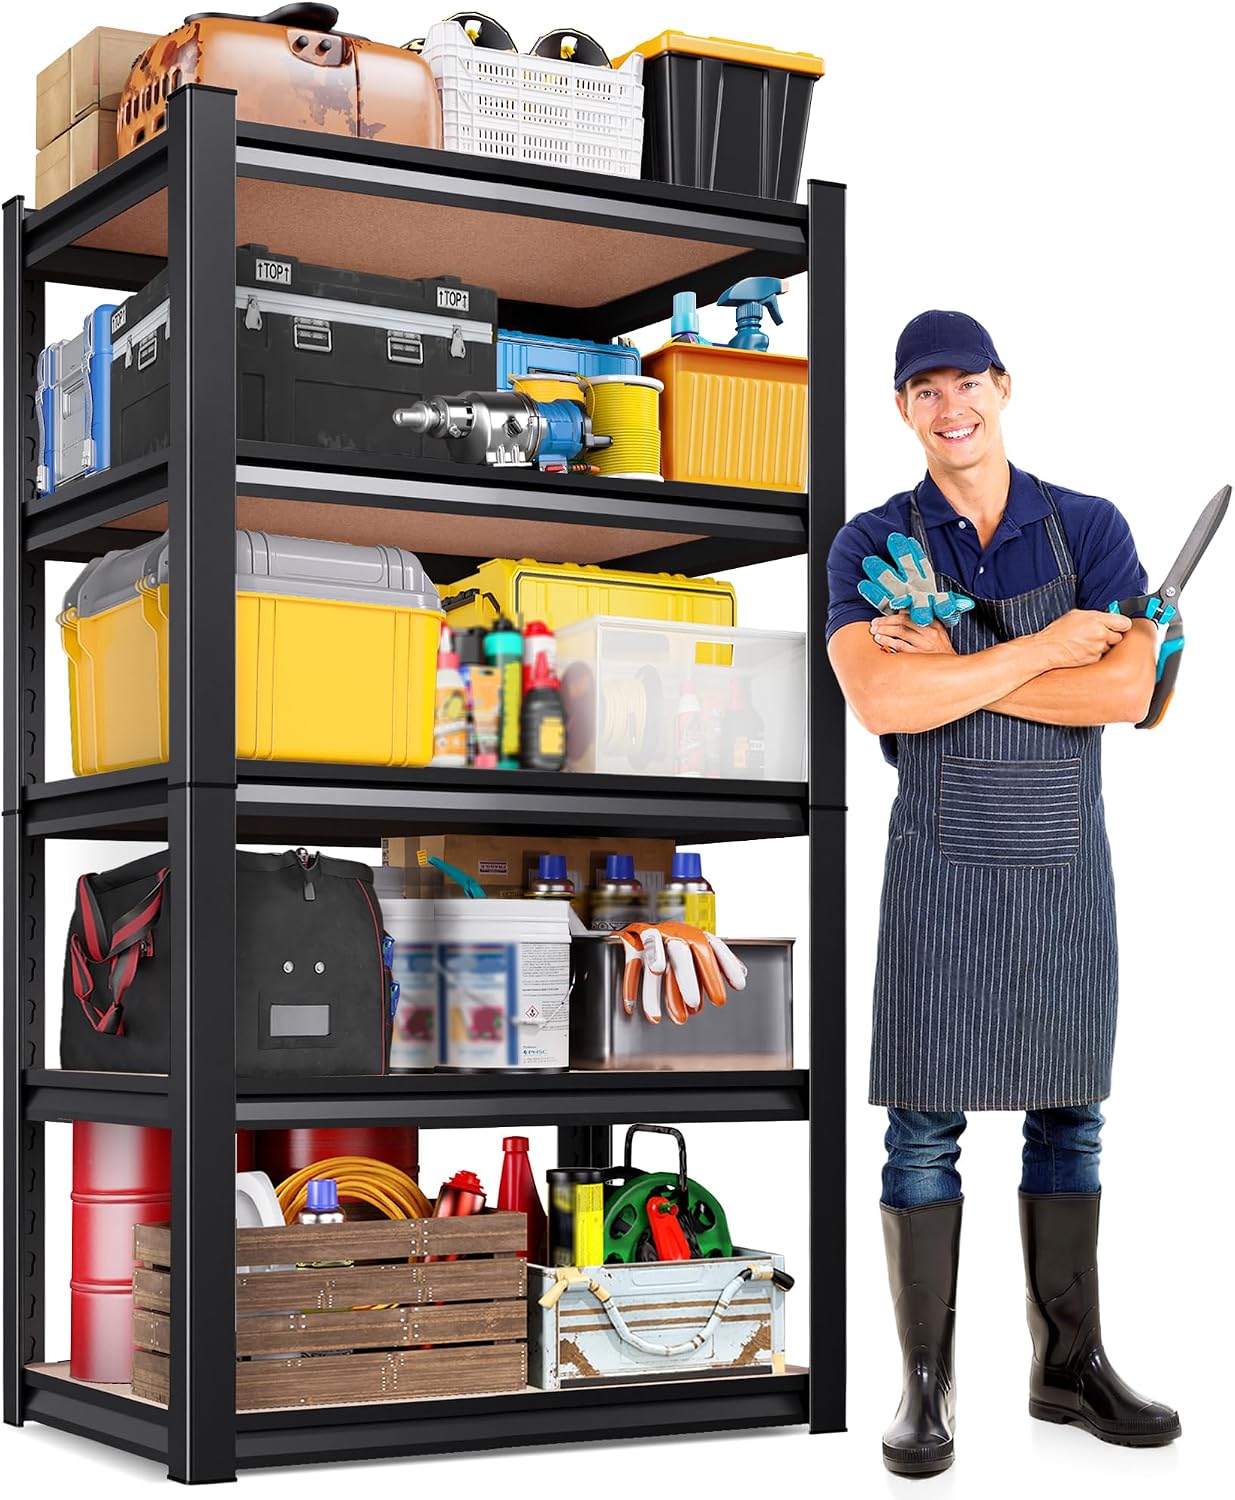
The load-bearing pick: 71"H x 28"W x 12"D Garage Shelving Unit, 5-Tier Heavy Duty Metal Storage Shelves 1900 LBS Capacity, Adjustable Utility Steel Racks and Shelving for Garage, Pantry, Basement, Warehouse, Black
 Visit on Amazon →
This is the shape I want in a working garage. Seventy-one inches tall puts the top tier at a height you can still reach without a ladder, 28 inches wide means it fits between a garage door track and a back wall, and 12 inches of depth keeps it flush enough that a car door still opens. Five tiers with adjustable shelf heights is the part that matters most, because your totes, coolers, and tool boxes are not all the same height, and a fixed shelf wastes more space than it saves.
The 1,900 pound capacity is the whole unit, and I treat that number the way I treat every rating: as a lab figure, not a promise about your wall. Spread your load across the tiers, keep the heavy stuff low, and put the dense items near the uprights instead of in the middle of a span. The steel is not the part I worry about. The anchors are.
What I would check before loading it: whether the shelf heights adjust in small enough increments to fit your tallest tote with room to spare, whether the uprights have feet that sit flat on a slab, and whether there are mounting points on the back so you can tie it into studs. A tall unit that is not anchored to the wall is a tipping hazard, even when it is not overloaded.
This is also the unit I would put in a pantry, a basement, or a warehouse corner, because the dimensions are friendly to tight spaces. Black steel shows dust, but it also hides the scratches that come with real use.
Flaws but not dealbreakers: Five tiers means five places to accumulate stuff you do not need. Be honest about that, or the top two shelves become a museum of things you forgot you owned.
Anyone who needs one unit to carry the garage's real weight and still leave room for a car should start here.
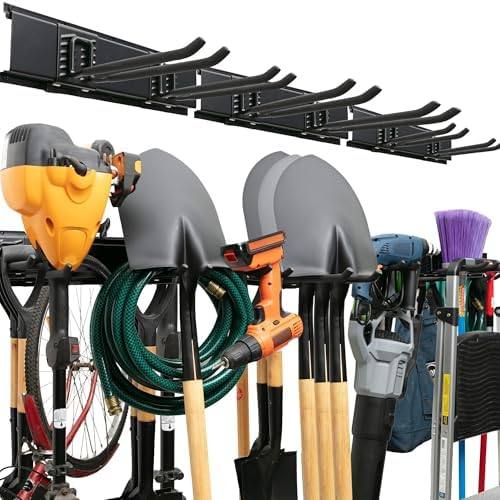
The wall pick: TIDYME Garage Tool Organizer Wall Mount, 48", 3 Racks 6 Hooks, 300 lbs
 Visit on Amazon →
The second piece is about the stuff that never fits on a shelf: shovels, rakes, a ladder, extension cords, the hose, the broom you use twice a year. A 48 inch wall mount with three racks and six hooks covers that whole category and gets it off the floor, which is the only place a garage ever truly runs out of.
The 300 pound rating tells you what this is for. Hand tools, garden tools, cords, hoses, ladders: yes. A spare engine block or a bucket of bolts: no. Match the load to the hardware, and this panel will outlast the shelf.
The install detail that matters is the span. Forty-eight inches crosses three studs on a standard 16 inch layout, which is exactly what you want, because a panel anchored at both ends and the middle is not going anywhere. If your studs do not land where the panel wants them, do not improvise with drywall plugs. Add a plywood backer across the studs first, paint it to match, and mount the panel to the backer. That is a 20 minute detour that turns a bad wall into a good one.
Racks and hooks are also repositionable in most of these systems, which means you can hang the rake where the rake actually goes instead of where the slots happen to be. That sounds like a small thing. It is the difference between a system your household uses and a system your household works around.
Flaws but not dealbreakers: A 48 inch panel is wide. Measure the wall before you order, and keep it clear of the car door swing and the garage door track.
Anyone with a wall of long-handled tools and no floor space left should mount this before buying another shelf.
The actual install workflow
Here is the order I use. Follow it and you will not be drilling twice.
Step one: Empty the wall and find the studs. Everything comes off. Then run the stud finder across the whole wall and mark both edges of every stud with painter's tape. Standard framing is 16 inches on center, sometimes 24. Do not guess from the outlets.
Step two: Pick the location. Side walls beat the back wall in most garages, because the back wall is where the garage door track and the opener live. Leave enough aisle to open a car door and walk past with an armload. Twelve inches of shelf depth plus 30 inches of walking room is a comfortable working number.
Step three: Set the base and level it. Assemble the unit where it will live, not in the driveway where you will then have to move it. Check the slab with a level. Concrete slopes toward the door on purpose. Shim the feet until the unit is plumb and level, then confirm the shims are under the uprights, not under the middle of a shelf.
Step four: Anchor it to the wall. Lag bolts into studs, through the mounting points, with washers. Not drywall plugs, not self-drilling anchors sold in a plastic bag at the checkout counter. On concrete or block, switch to wedge anchors sized for the hole. Snug them, do not gorilla them. Bolts that strip before they are tight are one of my least favorite things about cheap hardware, and over-torquing is how you find out.
Step five: Load it from the bottom up. Heavy items on the lowest tier, near the uprights. Medium weight in the middle. Light, bulky, rarely used items on top. If a tier visibly deflects when you set something down, that item belongs lower.
Step six: Mount the wall panel after the shelf is set. You do not want to be working around a loaded shelf. Hold the panel against the wall, level it, mark the holes through the mounting slots, then drill. Hit at least two studs, three if the span allows. Tighten, then check level again, because hardware shifts as it seats.
Step seven: Arrange the hooks by use, not by symmetry. The tool you grab daily goes at waist height near the door. The ladder goes high and out of the walking path. Aesthetic spacing is for showrooms.
Step eight: Come back in a week, then again after the first cold snap. Re-check the anchors, the bolts, and the level. Temperature swings move wood and steel at different rates, and the first hard freeze is when loose hardware announces itself.
Where people get it wrong
They trust the rating and ignore the mount. Weight ratings are measured at the bracket, not at the shelf, and never at your drywall. The rating is a ceiling on the hardware, not a plan for the wall.
They use the anchors in the box. "Wall anchor included" usually means a drywall plug. A shelf anchored into drywall alone is a shelf that is coming down. Find the studs or find a wall plan.
They skip the slab. A leaning unit is a loaded spring pulling on your anchors. Level it, shim it, and check it with a tape measure from the wall at the top and the bottom.
They load the top first. It is easier to reach, so the heavy stuff goes up, and then the whole thing feels tippy for a year. Bottom up, always.
They buy wire shelving for heavy goods. Wire is fine for light items stored high. The wires sag and the clips pop under real weight.
They forget winter. Cheap powder coat flakes after one season of freeze and thaw. If the finish is already failing, the welds are next on your list to watch.
How the two pieces fit together in a two-car garage
Put the shelving unit on a side wall, toward the front of the bay, where it is out of the door swing and easy to reach from the house. Put the wall organizer over the workbench or beside the man door, wherever the long-handled tools actually get used. Keep both out of the path of the garage door track and the opener arm.
Then use the ceiling. Ceiling storage is the only free real estate in a garage. If you are not using it, you are renting it to the air. That is a different project, but it is the next one.
Questions I get every week
Do I have to hit studs? Yes. Every time. Drywall anchors are for pictures and towel bars. A loaded shelf needs wood or concrete, and on concrete you need the right anchor for the material.
Can I hang the wall organizer on drywall alone? No. Forty-eight inches spans multiple studs on a normal wall. If your layout does not line up, add a plywood backer and mount to that.
How much can I actually put on the shelving unit? Less than the label says, in the sense that the label assumes a perfect wall. Keep heavy loads low and over the uprights, and re-check the anchors after the first week.
How long does this take? One afternoon for both pieces, including the trip to the hardware store for the right bolts. The stud finding and the leveling are most of it.
The bottom line
The best storage system is the one your spouse does not hate, and the one that is still on the wall next spring. Buy a unit with real capacity, mount it into wood, level it on the slab, load it from the bottom up, and put the long-handled tools on the wall where they belong. Then measure your aisle, park the car, and call it done.