
A garage shelf almost never falls because the steel was too thin. It falls because somebody trusted drywall, or because the heavy load went on the top tier and turned a stable rack into a lever, or because nobody leveled it and a Kansas City winter finished the job. Heavy duty garage shelving is the simplest upgrade in the building, and it is also the one homeowners get wrong most often, because the part that fails is never the part you can see in the product photo.
I have been installing shelving in garages for a living for a long time now. The rules below are the same ones I use on a paying client's garage: figure out the wall first, pick a unit that matches the load, then bolt it to structure instead of to paint.
This is a how-to, not a shopping list. But you need a unit before you can install one, so there are two picks below, one for the 3,000-pound class and one for the narrow wall, followed by the install workflow that works for both.
Why you should trust me
Twenty years as a general contractor in Kansas City, and the last eight of those spent almost entirely on garage storage: shelving, ceiling racks, wall panels, workbenches. I have installed hundreds of shelving units in garages the owner swore were "never going to be organized," and I have made believers out of most of them.
My test is not complicated. Load it with what the label says, then double it, then leave it a year and come back with a level. I keep a tape measure in every pocket and a stud finder in every truck. Most of what I know about shelving I learned from failures, including two of my own early ones, one of which involved a wire shelf and a case of paint.
What I care about here is the load path. Studs, anchors, feet, floor. If any one of those four is wrong, the shelf is coming down, and it does not matter what the box promised.
How I judged these two racks
I looked at four things, in this order.
The load path. Where does the weight actually go? On a bolt-together steel rack, it travels down the posts to the feet and, if the unit is anchored, into the wall. A rack with a wide footprint and leveling feet is doing most of its work on the floor, which is exactly where you want it.
The adjustability. A shelf you cannot move is a shelf you will outgrow in a year. Both units here are adjustable, and that matters more than most buyers think, because garage storage changes as your hobbies do.
The footprint. Garage floor space is the most expensive square footage in the house. Measure your parking space before you order anything, then measure the rack, then add 30 inches of clearance in front of it so you can actually reach the top shelf without dragging a step stool around.
The install. Can two people with normal tools put it together in an afternoon without a second trip to the hardware store? If the answer is no, the rack is wrong no matter how strong it is. I have turned down units for exactly this reason.
What you need before the first bolt
Gather this first. Half the installs I get called out to fix failed because the homeowner started at 4 p.m. on a Sunday with a cordless drill and no plan.
- A stud finder. A real electronic one, not the magnet kind that finds nails.
- A 4-foot level. A 2-foot level will let a tall rack lean and you will not see it.
- A tape measure and a pencil.
- A drill with a driver bit and a 3/16-inch bit for pilot holes.
- Structural screws or lag bolts long enough to reach about 1.5 inches into a stud, plus fender washers.
- A second person for the top tier, always.
- A plywood backer board if your studs do not land where the rack's uprights do.
If you have a sloped garage floor, and most of us do, the leveling feet on the rack are not a gimmick. They are how you get the posts plumb.
The two racks I would put in a garage
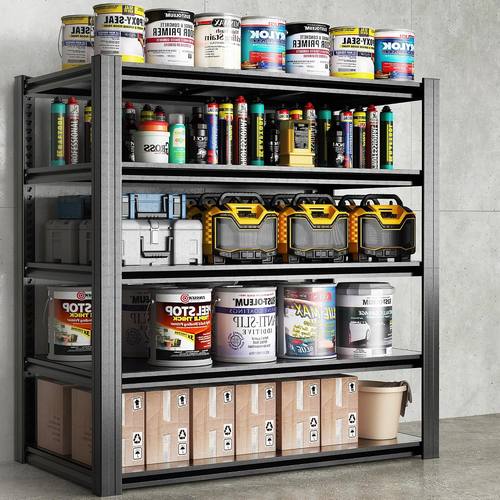
The heavy-load pick: 72" H Shelving Unit 5 Tiers Heavy Duty Garage Shelving 3000LBS Storage Racks Adjustable Metal Shelves Industrial Utility Rack for Garage, Workshop, Basement, Home Office 72" H47.2W23.6D
 Visit on Amazon →
The label on this one says 3,000 pounds, and I want you to read that number the way a contractor reads it: as a lab number. It assumes a flat floor, all five tiers loaded evenly, and a unit that is either anchored into structure or standing on a perfect slab. Your garage is not a lab. A rack in this class is still the right answer for tile, paint, engine parts, and totes full of books, and the steel is not the weak link.
Five tiers at 72 inches tall gives you usable height without needing a ladder for the top shelf, and the 47.2-inch width by 23.6-inch depth footprint is the size that runs along a garage wall without eating the parking bay. The shelves are adjustable, which is the feature I would pay for twice, because a rack you can reconfigure is a rack that survives your next hobby.
Flaws but not dealbreakers: Racks in this class are heavy before you put anything on them, and the parts arrive flat. Budget two people, one afternoon, and a cleared stretch of floor. Also remember that the 3,000-pound figure is a whole-unit number under ideal conditions, not a per-shelf promise. Distribute the load, heavy stuff low.
Anyone loading real material, tile boxes, tool cases, or a shop's worth of parts, should start here. Check current Amazon price.
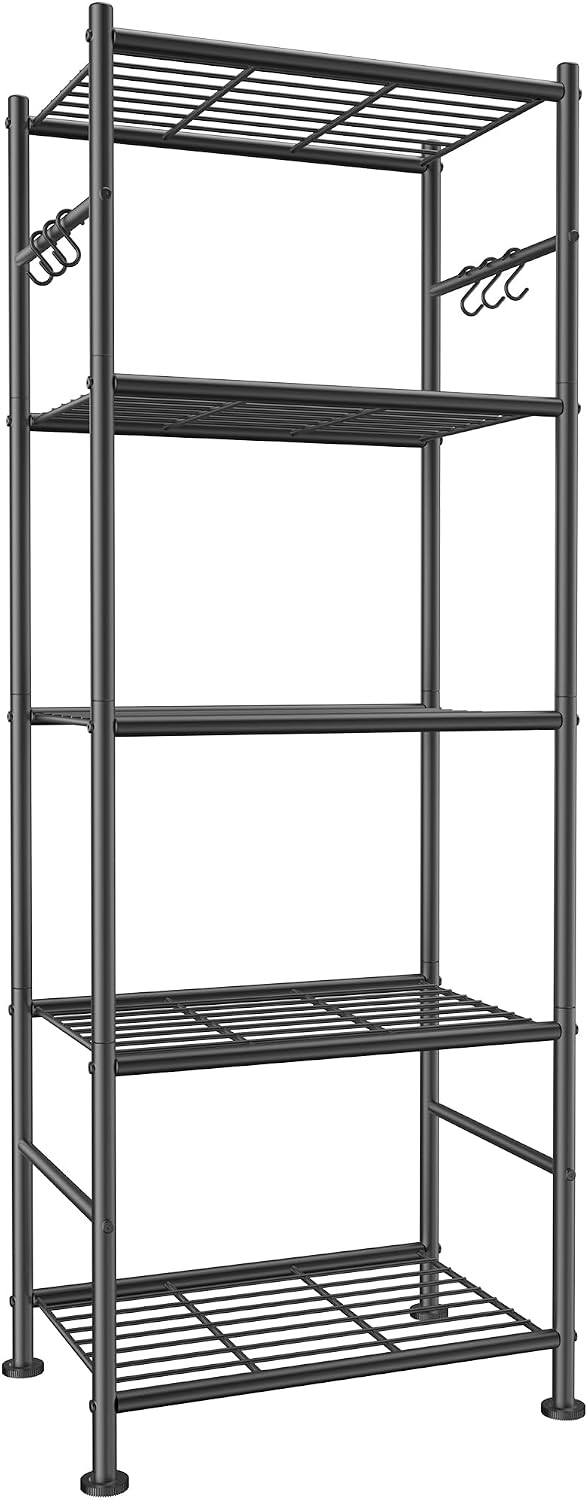
The narrow-wall pick: Sakugi 5-Tier Storage Rack Organizer with Hooks, Heavy Duty Metal Garage Rack with Leveling Feet, Freestanding Utility Rack for Bedroom, Balcony and Garage, 18.1"×12.4"×56.8", Black
 Visit on Amazon →
This is the rack for the narrow wall, the one beside the water heater or between the service door and the corner. Five tiers in an 18.1-inch width and a 12.4-inch depth footprint, 56.8 inches tall, with leveling feet and hooks included. The hooks are the part that sells it: brooms, extension cords, a hose reel, the stuff that otherwise leans in a corner and falls on your foot twice a month.
The depth is the tradeoff. Twelve inches is a can-and-tote shelf, not a toolbox shelf. Treat it as the light-duty unit it is and it will last a long time.
Flaws but not dealbreakers: A narrow, tall freestanding rack is tippier than a wide one, and cranking the leveling feet too far makes that worse. Anchor it to a stud or tuck it into a corner where it cannot travel. Keep heavy items on the bottom tier and light stuff up top.
Anyone organizing paint cans, cleaning supplies, seasonal decor, or a mudroom wall should look at this one. Check current Amazon price.
How to read a weight rating without getting fooled
Three things to know before you trust any number on a box.
First, ratings are usually measured at the bracket or the post, not across the middle of the shelf. Drop a 200-pound engine block in the center of a shelf rated for 600 pounds and you are testing the shelf, not the rating. Spread the load or reinforce the span.
Second, drywall holds nothing. A drywall anchor is for a picture frame. It is not for a rack that will hold your tools. Find studs, or add a plywood backer that spans at least two studs and anchor into that.
Third, a garage is a hostile environment. Kansas City swings from single digits to triple digits, and that cycle works on powder coat, on wood, and on anything you bolted with the wrong hardware. The weld usually outlives the finish. That is normal, and it is why I care more about the load path than the paint.
Step-by-step: installing a garage shelving unit
Step one: pick the wall before you pick the rack. Walk the garage with a tape measure. Where does the car door open? Where is the electrical panel, the water heater, the garage door track? A rack that blocks any of those is a rack you will move twice.
Step two: find the studs and mark them. Mark the center of every stud across the whole run with a pencil at 48 inches up, then extend those marks with a level. You will thank yourself when the uprights do not line up with where you guessed.
Step three: check the floor. Garages slope toward the door, and slabs crack. Set the rack in place empty and see how it sits. If one corner floats, that is what the leveling feet are for.
Step four: assemble the rack on its back. Lay the posts flat, attach the bottom shelf, then work your way up. Flipping a fully assembled 72-inch rack alone is how people get hurt. Build it on its back, then tip it up with help.
Step five: level it, then tighten everything. Set the rack where it will live and adjust the feet until the posts are plumb front to back and side to side. Only then do you go around and snug every bolt. A rack that is tightened crooked stays crooked.
Step six: anchor it to structure. This is the step that matters. Drill pilot holes through the rack's uprights into the stud centers you marked, then drive structural screws or lag bolts with washers. Two anchors per upright, one high and one low, minimum. If the studs do not line up, screw a plywood backer to the wall across two or three studs and anchor the rack to the backer.
Step seven: load from the bottom up. Heavy on the bottom tier, light on top. Totes and boxes you lift often go at chest height. Anything you touch once a year goes up high, and if it is really heavy and really annual, it belongs in a ceiling rack, not on a shelf.
Step eight: check it in a month, then in a year. Bolts loosen, feet settle, and slabs move. Walk out with a level and a wrench after the first month of real use, then again after a winter. Ten minutes of maintenance beats a shelf full of paint on the floor.
Three mistakes that put shelving on the floor
Anchoring into drywall. The most common one. "Wall anchor included" usually means a drywall plug, and a drywall plug in a garage holds about as much as a thumbtack.
Loading the top tier first. It is the easiest shelf to reach when you are standing there with a box, and it is the one that turns a stable rack into a lever. Bottom first, always.
Skipping the leveling feet. On a sloped slab, a rack with four points of contact and no adjustment will rock. Rocking works bolts loose, and loose bolts are how a rack ends up leaning against your wife's car.
What this all costs
The rack is the cheap part. The hardware, the backer board if you need one, and the afternoon are where the money and the time actually go, and none of that changes whether you buy the wide unit or the narrow one.
What changes with the big unit is what you can put on it. A 72-inch, five-tier rack in the 3,000-pound class replaces a wall of plastic bins and a floor pile, and it does it on a footprint smaller than a chest freezer. The narrow Sakugi rack does the same job for the stuff that never needed a 47-inch shelf in the first place.
The honest math: one afternoon of measuring, anchoring, and leveling, plus ten minutes a year with a wrench. Do that, and the shelf outlives the stuff you put on it.
The bottom line
Heavy duty garage shelving is a wall problem before it is a shelf problem. Find the studs, pick a unit that matches the load, level the feet, anchor the uprights into structure, and load it from the bottom up. That is the whole job.
If you want the capacity, the 72-inch five-tier rack is the one. If you want the narrow wall handled, the Sakugi rack with the hooks is the one. Either way, put the tape measure in your pocket before you start, because the number that matters is not on the box.