Most garage storage fails at the same place, and it is not the shelf. It is the wall behind it. Garage shelving and slatwall storage get sold to homeowners as a shopping problem, when nine times out of ten it is a load path problem. Where does the weight go, what carries it, and what happens when the garage swings from 95 degrees in July to 15 in January and every fastener on that wall works itself a little looser each season?
I have been building and finishing garages for twenty years, and the last eight have been mostly storage systems: shelving, ceiling racks, wall panels, workbenches. I have hung racks in garages the owner swore were hopeless and made believers out of most of them. The pattern never changes. People buy the right shelf and fasten it to the wrong thing, or they fasten it to the right thing and load it in the wrong order.
This is the order I actually work in. It holds for a freestanding wire rack, a slatwall panel with baskets and hooks, or all of it on the same wall. It starts with a stud finder, not a shopping cart.
Why you should trust me
Twenty years as a general contractor around Kansas City, eight of those spent specializing in garage storage. I have installed hundreds of shelving units, which means I have also been called back to a few. That is where the rules in this article come from.
My standard is what I call the contractor test: load the unit with what the label says it holds, then double it, then leave it a year and see what moved. Weight ratings are measured in a lab with perfect mounting on perfect framing. Your drywall is not a lab. I do not quote a load number I have not watched survive a winter, and I do not call a job a one-hour install without timing it myself. There is a tape measure in every jacket I own, and that is not an exaggeration my wife would let me get away with.
How I picked and how I tested
Everything below has to pass four questions before it goes in a client's garage, let alone mine.
- Does it survive double the rated load for a year, through freeze and thaw?
- Can a homeowner install it with normal tools and a level?
- Does it hold up to a garage's temperature swings without the finish failing first?
- Would I put it in a paying client's garage and hand over the invoice?
The two products here are the two ends of a garage wall: a freestanding rack that carries the weight, and a set of wall accessories that turns dead wall space into working storage. One sits on the floor, one hangs on a panel, and they solve different halves of the same problem. I looked at how each one mounts, what it is made of, and what a homeowner would actually have to do to install it on bare studs, on finished drywall, and on a block wall.
The two pieces of hardware this job runs on
A rack and a wall system are not competitors. The rack takes the bulky, heavy, floor level storage. The wall accessories take the light, awkward, high frequency stuff that never has a home: cords, balls, hoses, the ladder. Here is what each one is actually for.
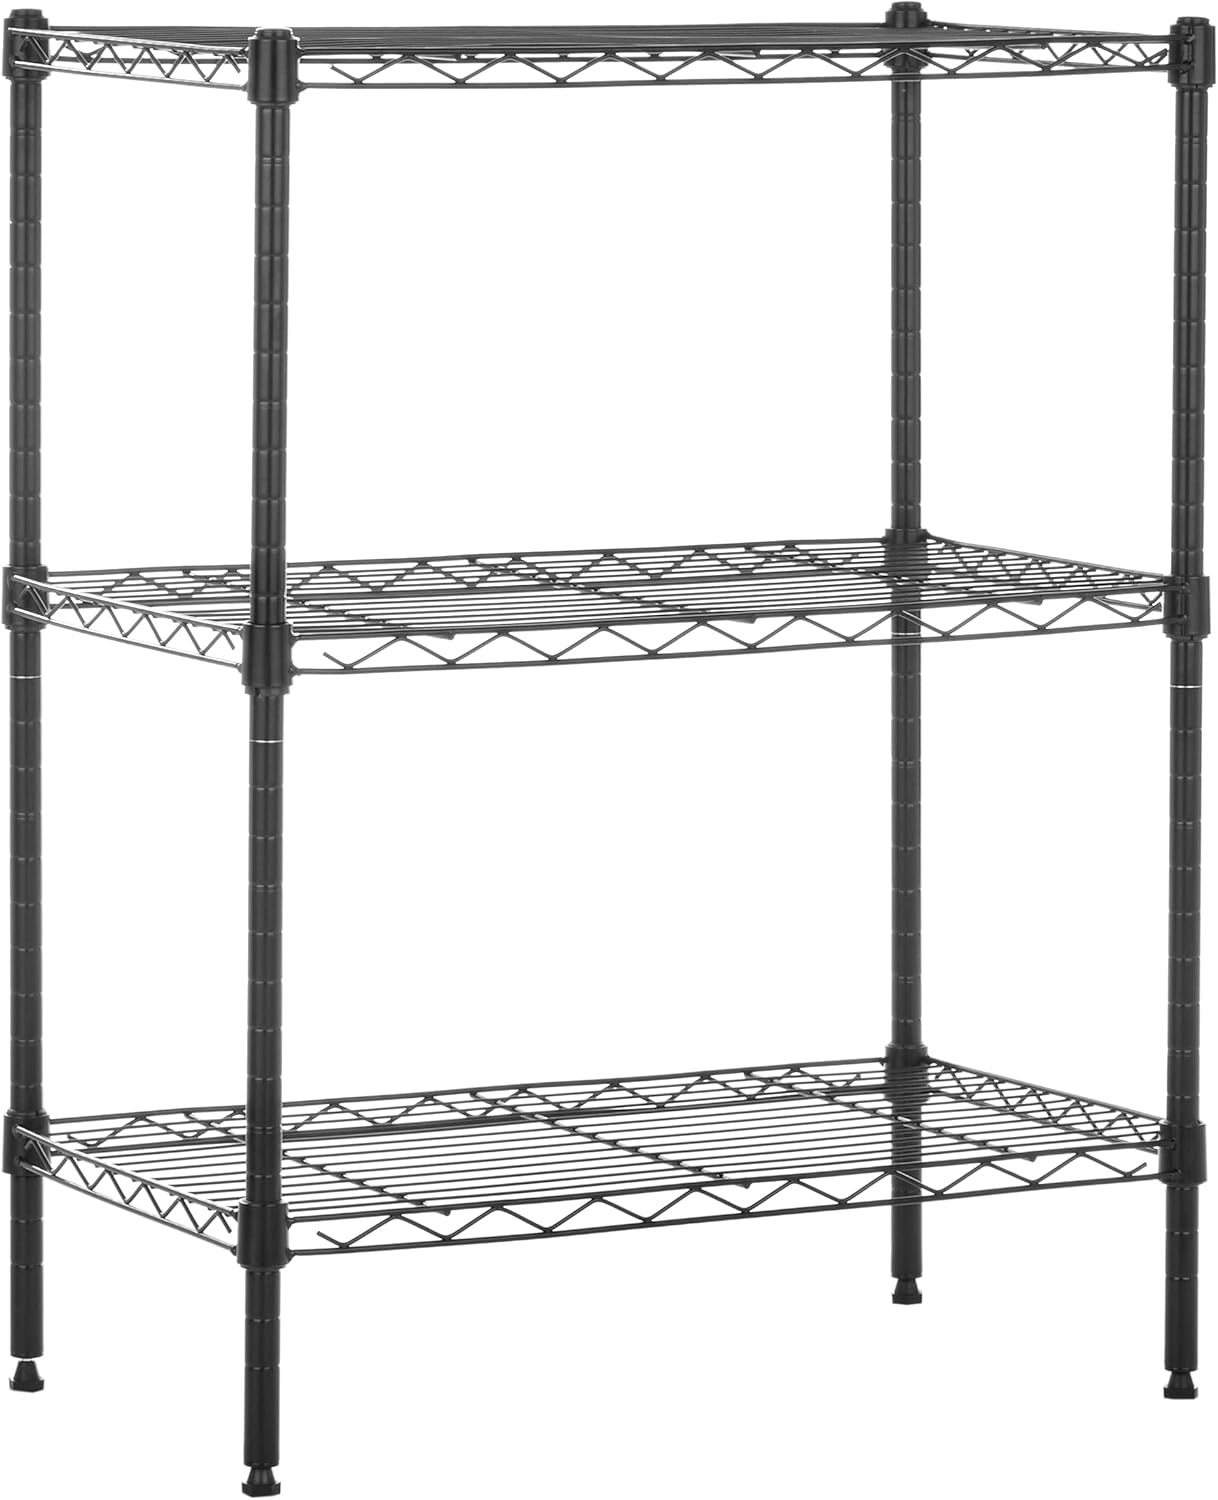
Starter rack: Amazon Basics 3-Shelf Adjustable Heavy Duty Steel Wire Rack Storage Shelving Organizer with Storage Space, Versatility and Ease of Use for Kitchen, Garage, 23.2" L x 13.4" W x 30" H, Black
 Visit on Amazon →
This is a freestanding three shelf wire rack at 30 inches tall, which puts the top shelf at roughly counter height. That height matters more than people expect. It is low enough that you can see over it from the garage door, and low enough that a loaded top shelf does not turn the unit into a tipping hazard when somebody nudges it with a bumper.
The adjustable shelf positions are the real feature. You can set the bottom shelf high enough to slide a shop vac or a mop bucket underneath, then set the two shelves above it for paint, chemicals, and small totes. It is wire, so it does not collect dust the way a solid shelf does, and you can see what is on the shelf from across the garage.
Be honest about what this is. It is a light to medium duty freestanding rack, not a load bearing wall unit. Wire shelves are for totes, paint cans, jugs, and boxed goods. The moment you start stacking engine blocks or a full tool chest on a wire rack, you have made a bet, and the wires are the ones that lose. Keep the heavy stuff on the bottom shelf, keep the load centered, and keep the unit off a sloped garage floor by shimming the front feet if your slab drains toward the door.
Because it stands on its own, it needs no studs, no anchors, and no permission from a landlord. That alone makes it the right first purchase for a rental, a block wall garage, or anybody who is not ready to drill into a wall they might want to repaint.
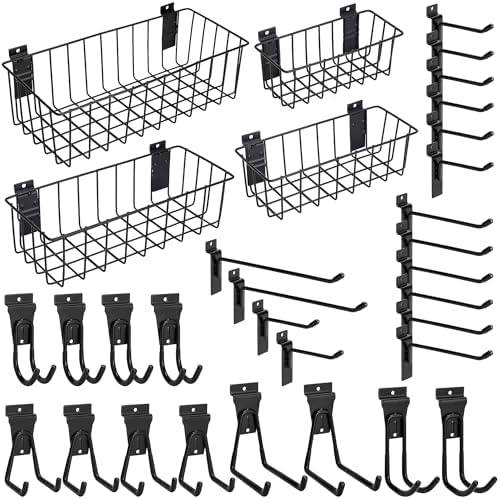
Wall add-on: Heavy-Duty Slatwall Baskets and Hooks - Slatwall Accessories for Standard Slatwall Panels | Ideal for Organizing Garages and Workshops
 Visit on Amazon →
Read the product name carefully, because it tells you exactly what you are buying: these are accessories for standard slatwall panels. They are not the panel. If you do not already have slatwall on the wall, or you are not planning to install it, this box will sit on a shelf.
What it gives you once the panel is up is the thing a plain shelf cannot do: a place for the awkward stuff. Baskets swallow basketballs, extension cords, gloves, and the loose hardware that otherwise migrates to the workbench. Hooks take the ladder, the hose reel, the trimmer, and the cords you trip over twice a week. The whole point of slatwall is that you can move a hook six inches to the left in ten seconds without patching a hole, which is why it beats a row of screwed in brackets for anything that might change.
Here is the caveat that matters more than the accessories themselves. The baskets and hooks are only as strong as the panel they clip into, and the panel is only as strong as what it is fastened to. If the panel is screwed into drywall with the plastic plugs that came in the box, the accessories are decoration. Fasten the panel into studs, or into a plywood backer that is itself fastened into studs, and the system will carry what it claims to carry.
Check the panel slot spacing before you order. Standard slatwall spacing is standard for a reason, but a cheap panel from a discount rack is not always cut to it, and a hook that will not seat is a hook that will not hold.
The install order that keeps a wall working
Now the part that actually decides whether this works. Follow the order. Skipping step one is how shelves end up on the floor.
Step one: identify the wall. Concrete block, poured concrete, finished drywall over studs, or bare studs. The answer changes every decision after it. A block wall needs masonry anchors or a furred out plywood backer. Drywall alone holds nothing you care about.
Step two: find the studs. Stud finder first, then confirm with a thin finish nail or a small drill bit where it will not show. Mark the center of every stud in pencil at the height you are working. Mark them twice if you have to. I have drilled through a water pipe in a garage wall and I own the t-shirt, so I mark before I cut, every time.
Step three: decide the load path. Ask where the weight goes. For a freestanding rack, the answer is the floor, which is the strongest thing in the room. For a wall panel, the answer is the studs, which carry into the top plate and down to the slab. If your answer is "the drywall," start over.
Step four: plan the zones before you drill. Park the car in the garage and open both doors. Everything you mount needs to clear that swing plus a foot for your knees. The zone above the hood is for long, light items. The wall beside the door is for the rack and the heavy totes. The wall behind the workbench is for slatwall and hooks. Draw it on paper. Ten minutes of drawing saves an afternoon of moving anchors.
Step five: install the rack first. Set the freestanding unit in its spot, level it front to back and side to side, and shim the feet if the slab slopes. Load the bottom shelf first, then work up. A rack loaded from the top down is a rack that tips.
Step six: install the panel, then the accessories. Fasten the slatwall panel into studs with the longest screws the panel thickness allows, hitting every stud you marked. Then clip the baskets and hooks in and hang the light stuff first. Ladders and hoses last.
Step seven: load in layers. Heavy and low, light and high, frequently used at waist height. This is the same rule for every storage system ever built, and it is the one people break first because the top shelf is the easiest one to reach.
Step eight: come back in a week and re-check. Grab every fastener and give it a quarter turn. New installs settle, especially into wood that has been drying in a garage for twenty years. Then re-check at the season change, once in the fall and once in the spring, because that is when a garage wall moves the most.
Where this goes wrong
The failures I get called back for are almost never the product. They are these.
- Drywall plugs sold as wall anchors. The package says a wall anchor is included, and what is in the bag is a plastic plug rated for a picture frame. If it is holding a shelf, it is a countdown.
- Loading the top shelf. Weight up high is weight that wants to tip the whole unit forward. Heavy goes low, always.
- A panel screwed to drywall. The slatwall itself is fine. What is behind it is not.
- Bolts that strip before they are tight. Stop when it stops turning freely, not when your wrist says stop.
- Forgetting the car. The best storage system in the world is useless if the door will not close.
- Skipping the shim. A rack on a sloped slab rocks, and a rocking rack walks its way across the floor over a winter.
None of these are expensive to avoid. All of them are expensive to fix, usually because they take something else with them on the way down.
What this all costs
Two pieces, two budgets. The freestanding wire rack is the entry point, and the slatwall accessories are the step up for anybody who already has a panel or is ready to add one. Check current Amazon price on both listings before you commit, because both of these categories move around on price more than the hardware itself changes.
The rack is the cheaper of the two and the one I would buy first, because it solves storage without touching a wall. The slatwall accessories cost more than the rack, and they are worth it only if you are also buying or already own the panel, plus the fasteners to hang it into studs. If you are pricing the whole wall, add the cost of a stud finder, a box of structural screws, and a plywood backer if your studs do not land where you need them.
Cost per day is the honest way to look at it. A rack that holds paint cans for ten years costs less per day than the paint inside it. A panel and hook system that gets the ladder off the floor and the cords off the bench pays for itself the first time you do not have to untangle anything to find a screwdriver.
The math is the easy part. The studs are the hard part. Find them, mark them, and load the heavy stuff low. That is the whole job, and it is the difference between a garage that stores things and a garage that drops them.