Most garages fail in the same two places. The floor gets one crowded rack, the ceiling stays empty, and the extension ladder lives leaning in a corner until it falls on somebody. Good garage shelving and ladder storage is not a shopping problem. It is a load path problem, and it starts with two questions: what is behind the drywall, and what is above your head.
I have been a general contractor for 20 years in Kansas City, and the last eight of those have been almost entirely garage storage: shelving, ceiling racks, wall panels, workbenches. I have installed hundreds of shelving units in garages that the owner swore were never going to be organized.
The two units in this guide cover both halves of a working garage. One is a rolling floor rack for totes, paint, and light tools. The other is a ceiling-mounted rack that gets your ladders off the wall and out of your way.
This is a how-to, not a haul video. I will give you the two picks, then the order of operations I use on a paying client's garage, including the steps most homeowners skip and the ones that decide whether your shelf holds what the label says or ends up on the hood of your car.
Why you should trust me
I have built or finished more garages than I can count, and I keep a tape measure in every pocket of every jacket I own. My standard for anything that hangs over a car or a workbench is what I call the contractor test: load it with what the label says, then double it, then leave it for a year. If a unit cannot survive that, it does not get recommended, and it does not get installed in a client's garage.
Weight ratings are measured in a lab with perfect mounting. Your drywall is not a lab. That single sentence explains most of the failures I get called out to look at. A rack rated for 300 pounds per shelf will absolutely hold 300 pounds per shelf when it is bolted into studs on a flat concrete floor. The same rack screwed into drywall with the plugs that came in the box will fail with a quarter of that load, and it will fail slowly, which is worse, because you will have it loaded before it lets go.
I do not get paid by brands. Nobody sends me free racks with strings attached. When something in this category is not worth your money, I say so, and there is one in this category I say it about often.
How I picked and how I tested
Every storage product that comes through my shop gets the same four questions.
- Does it survive double the rated load for a year?
- Can a homeowner install it with normal tools?
- Does it hold up to a garage's temperature swings, from a 100 degree July to a 10 degree January?
- Would I install it in a paying client's garage?
Those four questions cut the field fast. Powder coat that flakes in one winter fails question three. Bolts that strip before they are tight fail question two. And a rating measured at the bracket instead of the shelf fails question one, which is the one that matters.
The reason this guide has one floor rack and one ceiling rack instead of two floor racks is that the two problems are different. Floor storage is about density and access. Ceiling storage is about structural attachment and clearance. You solve them separately and you buy separately.
I am also not going to hand you a number I cannot stand behind. If you want the current figure, look at the listing. I will tell you what the label says and how to think about it.
The floor rack
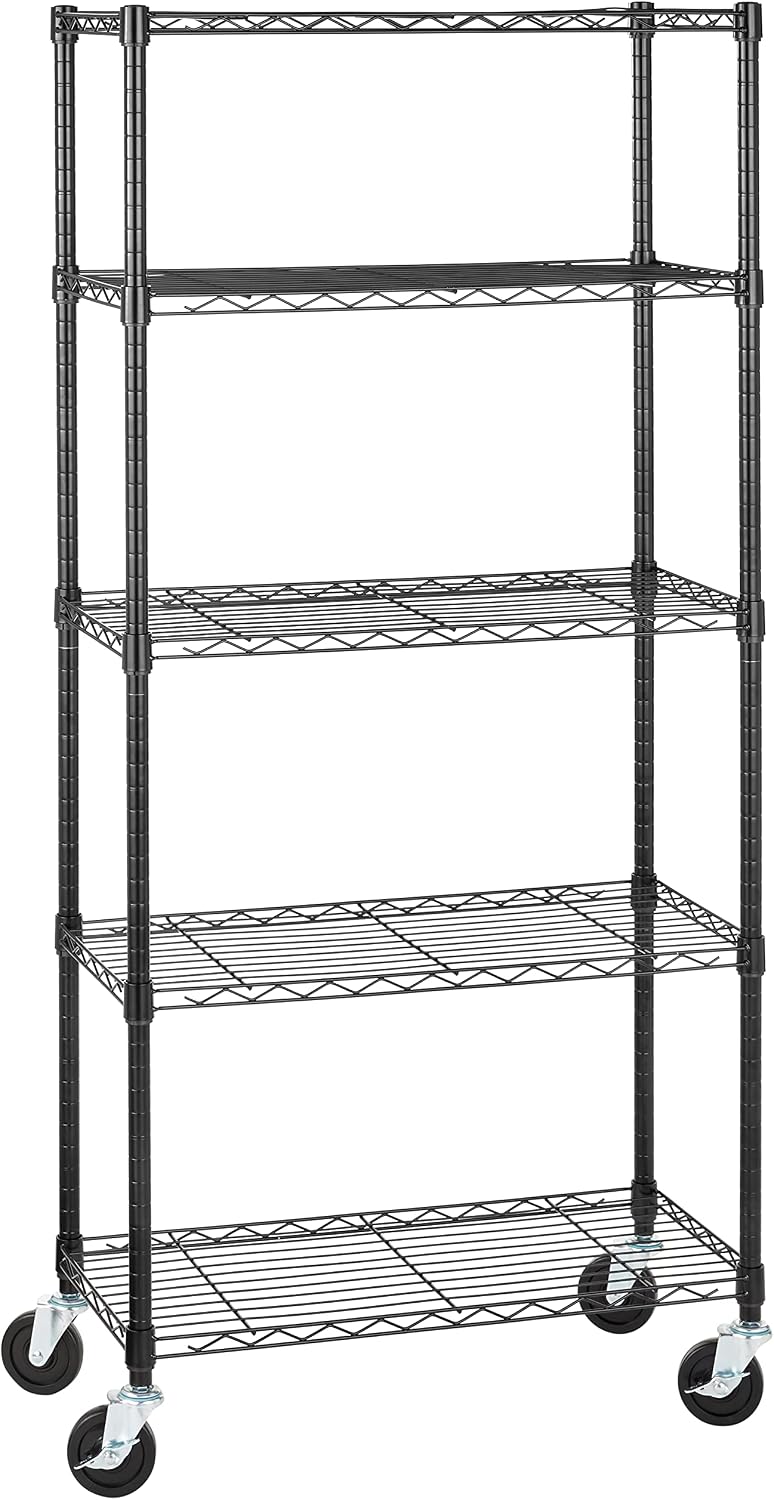
The rolling floor rack: Amazon Basics 5-Shelf Heavy Duty Garage Shelving Storage Rack with 4" Wheel Casters, Adjustable Metal Wire Organizer, 300 lbs Per Shelf, 30" x 14" x 64.75", Black
 Visit on Amazon →
Here is the honest version of my opinion on wire shelving, because people ask me about it constantly. Wire is not junk. Wire is a tool with a job. The job is totes, paint cans, boxes, coolers, and anything you need to see through to find. The moment you put a loaded tool box on a wire deck, you have made a bet, because wire sags under point loads, and the sag does not announce itself, it just quietly gets worse.
This rack is a five shelf unit, 30 inches wide by 14 inches deep by roughly 65 inches tall, with four inch casters and a label rating of 300 pounds per shelf. The adjustable shelves are the reason to buy it over a fixed unit. You can set the spacing to your totes instead of hunting for totes that fit the spacing.
The casters are the feature that sells it and the feature that will annoy you. Rolling means you can pull the whole rack out to sweep behind it, which in a garage is a real luxury. Rolling also means that on a sloped garage floor, or with one wheel chocked by a hose, it can travel when you do not want it to. If you load the bottom shelf heavy, it stays put. Load the top shelf heavy and you have built a tipping hazard on wheels.
Flaws but not dealbreakers: The 14 inch depth is narrow. It tucks beautifully against a wall, and it will not hold a big cooler or a deep storage bin. Buy it for what it is: a dense vertical wall of small and medium storage that you can move. Check current Amazon price before you commit, and read the listing for the current hardware kit.
Anyone who wants storage that can move with them, including renters, will get the most out of this one. Keep the heavy stuff on the bottom shelf, directly over the casters, and it behaves.
The ceiling rack
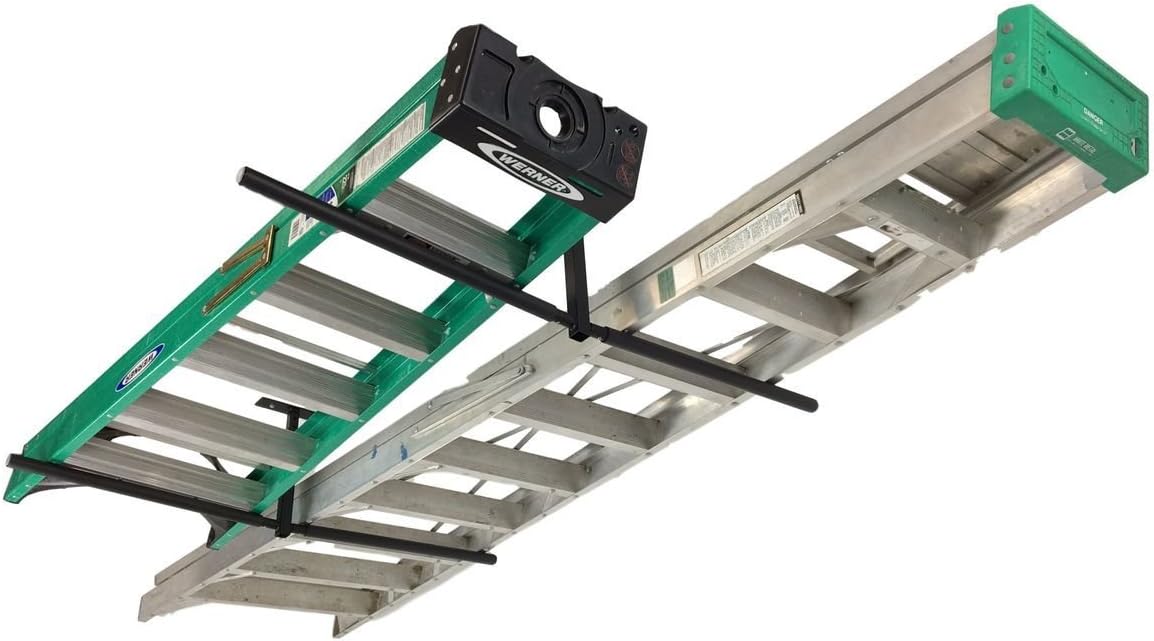
The ceiling rack: StoreYourBoard Adjustable Overhead Ladder Rack, Garage Organizer Ladder Shelf for Step & Extension Ladders - Storage Racks and Shelving for Garage Organization - Ceiling Mounted - Holds 150 lbs
 Visit on Amazon →
Ceiling storage is the only free real estate in a garage. If you are not using it, you are renting it to the air. A ladder is the perfect candidate because it is long, awkward, rarely used, and it is currently occupying a wall you could be using for something you touch every week.
This is an adjustable overhead rack for step and extension ladders, ceiling mounted, with a label rating of 150 pounds. Adjustable matters more than it sounds. Step ladders and extension ladders are different animals, and a rack that lets you set the width to the ladder you actually own beats a fixed bracket that fits nothing you have.
The whole install lives or dies on one thing: the ceiling joists. This rack has to land on two of them. One joist is a hinge, not a mount, and your ladder will swing like a pendulum every time the garage door opens. If your joists do not land where you want the rack, you span two or three joists with a plywood backer and mount to the backer. That is not a hack, that is how it is done.
Before you drill anything, get on a ladder with a tape measure and check three clearances: the garage door track and its travel, the opener rail and the door in the up position, and the headroom you need to lift a ladder up and slide it in. I have watched a homeowner mount a rack perfectly into joists and then discover the door panel hit the ladder on the way up.
Flaws but not dealbreakers: Getting a fiberglass extension ladder overhead takes two people or one person with a good step ladder and a plan. Do not try it solo on a windy day with a ladder that wants to spin. Also, the hardware included with most ceiling racks is a starting point, not a finish line. Bring your own structural screws.
Anyone with two ladders and no wall space should start here. It is the single best square footage move in a garage. Check current Amazon price, since these listings move.
The install order I use
Follow this order and you will not have to take anything apart.
Step one: Map the wall before you buy anything. Run a stud finder across the wall where the floor rack will live and mark each stud with painter's tape. Studs are typically 16 inches on center, and the first one is usually 16 inches from a corner, but verify. Do not trust the knock test alone. Confirm with a small finish nail if you have to.
Step two: Map the ceiling. Find your joists. If you have attic access, go up and look, because nothing beats eyeballs on lumber. Joists usually run perpendicular to the garage door. Mark two joists with tape on the ceiling and measure the distance between their centers so you know what your rack has to span.
Step three: Decide floor versus ceiling before you spend a dollar. Ladders go up. Heavy totes, paint, and tools go on the floor. Anything you use weekly stays between knee and shoulder height. Anything you use once a year goes high. This is the rule that keeps a garage usable instead of just full.
Step four: Assemble the floor rack where it will live. Build it near its final spot, not across the garage, because moving a loaded rack is a two person job and moving an empty one with casters is easy. Install the casters last so the frame does not roll away from you while you are trying to bolt shelves to posts.
Step five: Anchor the floor rack or accept that it rolls. If you are loading it heavy, run a strap or a bracket from the top of the rack into a stud. If you are keeping it light, chock two of the casters. A rolling rack that hits a car door is an expensive lesson in physics.
Step six: Mount the ceiling rack across two joists. Pre-drill, then drive structural screws, not drywall plugs, not the plastic anchors that come in the bag. If you are spanning with a backer, fasten the backer to at least three joists before you hang anything from it.
Step seven: Test with the ladder, not with your hands. Push up on the empty rack. Then hang the ladder and push up again. Then open and close the garage door and watch the rack. If it moves, something is loose, and it is better to find out now than with a ladder over your head.
Step eight: Load from the bottom and re-check after a season. Heavy low, light high. Then, after the first hot and cold cycle, go back with a wrench and check every fastener. Wood shrinks, bolts loosen, and a five minute check in October saves a shelf in January.
Common mistakes I see in Kansas City garages
- Drywall plugs under a load. A plug holds a picture frame. It does not hold a loaded shelf. Find the studs or build a backer.
- One joist mounting. A ceiling rack on a single joist is a hinge. Two joists or a backer, every time.
- Loading the top shelf first. The top shelf is the least stable place for weight and the hardest place to reach. Heavy goes low.
- Forgetting the door swing. Garage doors, opener rails, and car doors all move. Measure the travel, not the resting position.
- Trusting the box rating as an installed rating. The number on the label assumes perfect mounting. Your install is the variable.
- Buying plastic for heavy loads. Plastic shelving has its place: light stuff, high up. The moment you put a tool box on it, you have made a bet.
What this all costs
I am not going to quote you prices, because listings change and I would rather you see the real number. Here is the math that actually matters. Take whatever the listing says today, divide it by 1,825, and that is your cost per day over five years. A rack that lasts five years in a garage is cheap at almost any price you would pay for it. A rack that sags in one winter is expensive even if it was free, because you will buy it twice and you will move everything on it twice.
Budget for the fasteners too. Structural screws and a plywood backer are the cheapest insurance in this entire project, and they are the two things people skip. Both of the units above list their own hardware, but I always bring better screws. Check current Amazon price on each listing before you plan the project, and buy the fasteners on the same trip.
The bottom line
The best storage system is the one your spouse does not hate, and the one that is still standing in a year. Organization that gets vetoed does not work, and a shelf that comes down does not get rebuilt.
Get a stud finder, find your ceiling joists, put the ladders overhead where the air is free, put the totes on a rolling rack that you can pull out and sweep behind, and load it like an adult: heavy low, light high, anchored into wood. That is the whole job. It is a weekend, not a remodel, and it is the difference between a garage you park in and a garage you apologize for.